As already explained in our article on proxies, there are many reasons for using a reverse proxy. But how do I set up such a reverse proxy? This blog post shows how to set up an Nginx reverse proxy, using an Apache web server on its own domain as an example. These instructions apply to a Linux server with an Ubuntu operating system.
Docker
Since both the Nginx reverse proxy and the Apache web server are to run via Docker, the program must be installed at the beginning. To do this, these commands must be executed:
sudo apt-get update
sudo apt-get install ca-certificates curl
sudo install -m 0755 -d /etc/apt/keyrings
sudo curl -fsSL https://download.docker.com/linux/ubuntu/gpg -o /etc/apt/keyrings/docker.asc
sudo chmod a+r /etc/apt/keyrings/docker.asc

echo \
"deb [arch=$(dpkg --print-architecture) signed-by=/etc/apt/keyrings/docker.asc] https://download.docker.com/linux/ubuntu \
$(. /etc/os-release && echo "$VERSION_CODENAME") stable" | \
sudo tee /etc/apt/sources.list.d/docker.list > /dev/null

sudo apt-get install docker-ce docker-ce-cli containerd.io docker-buildx-plugin docker-compose-plugin

sudo apt-get install docker-compose
The corresponding documentation can be found here: https://docs.docker.com/engine/install/ubuntu/
Nginx
A dedicated folder must be created on the target system for the Nginx reverse proxy. A file named “docker-compose.yml” must be created in this folder. The following content must then be written to the file using a text editing program (e.g. nano):
version: '3.8'
services:
  app:
    image: 'jc21/nginx-proxy-manager:latest'
    restart: unless-stopped
    ports:
      - '80:80'
      - '81:81'
      - '443:443'
    volumes:
      - ./data:/data
      - ./letsencrypt:/etc/letsencrypt

networks:
  default:
    name: npm
    external: true
Before the container can be started, the corresponding Docker network must be created with the following command:
docker network create npmThe container can then be started with the command “docker compose up -d”. The admin interface can then be accessed via the following URL:
http://<IP-Adresse>:81By default, the account “admin@example.com” exists with the password “changeme”. This access data must be changed the first time you log in:


Apache
Similar to Nginx, a separate folder including a docker-compose.yml file with the following content must be created for Apache:
version: '3.9'
services:
  apache:
    image: httpd:latest
    container_name: apache-default
    volumes:
    - ./website:/usr/local/apache2/htdocs
networks:
  default:
    name: npm
    external: true
The Apache web server is then started with the command “docker-compose up -d” and runs under the name apache-default.
Accessibility on the Internet
The next step requires a dedicated domain that points to the IP address of the Linux server. In our example, the domain blogpost.hansesecure.com is used.
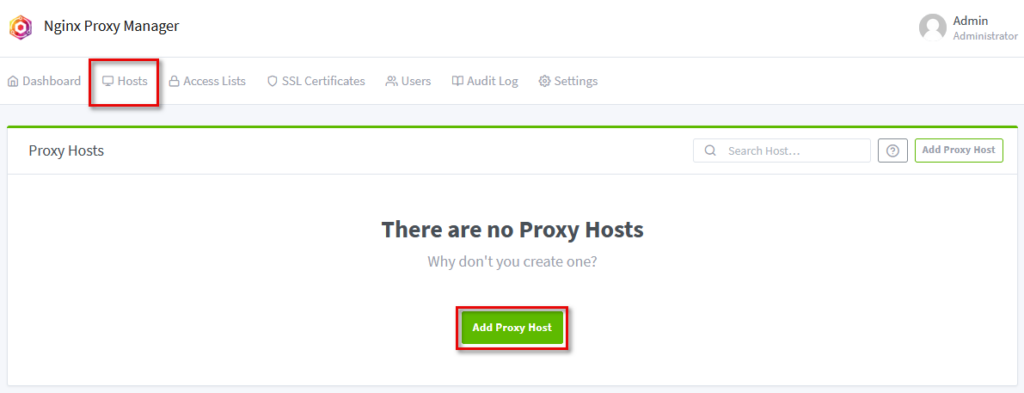
A new proxy host must first be created in the Nginx admin interface:

The following settings must then be made there:


After saving, the Apache web server can then be accessed via the URL:

Outlook
This blog post shows a simple way to make your own Apache web server accessible on the Internet via a reverse proxy.


